工具/材料
VirtualBox V5.2.12
macOS Sierra 10.12 Final系统映像
以下是在Windows10 VirtualBox上安装macos10.12 Sierra的步骤
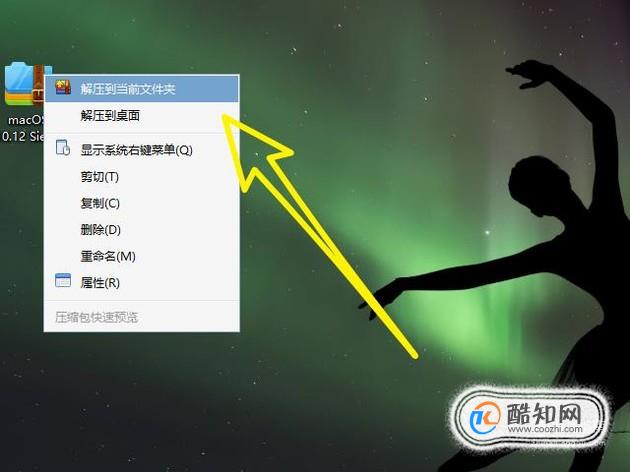
- 01用解压软件解压映像文件,选择系统映像,右键点击然后选择“解压到当前文件夹”,由于文件较大,请合理安排解压位置。解压后出现一个后缀vmdk的文件在接下来的步骤中需要用到。


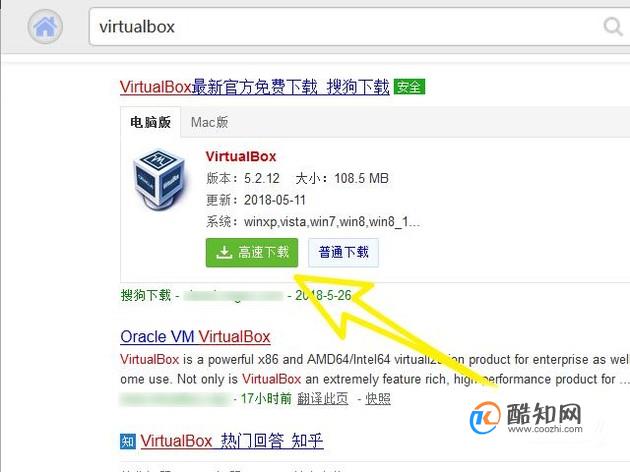
- 02安装virtualbox虚拟机,推荐使用搜狗搜索直接下载安装,本教程使用的是Virtualbox版本5.2.X,使用VMware同样可以装黑苹果,以后有机会编写相关文章。
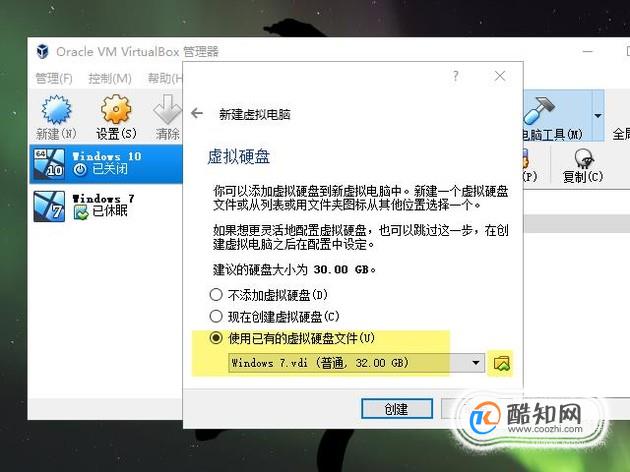
- 03创建新虚拟机
名称:Mac
类型:Mac OS X。
版本:Mac OS Sierra 10.12。
内存大小为4GB (本机RAM的50%)
虚拟磁盘文件:macOS 10.12 Sierra.vmdk。


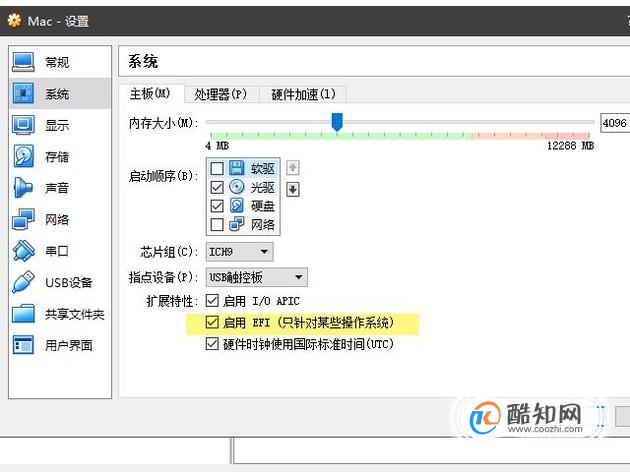
- 04自定义虚拟机的设置。
CPU: 4核心CPU(我的CPU是core I7)并启用PAE/NX。

- 05系统:启用EFI、关闭软驱,芯片组为PIIX3或IHC9。


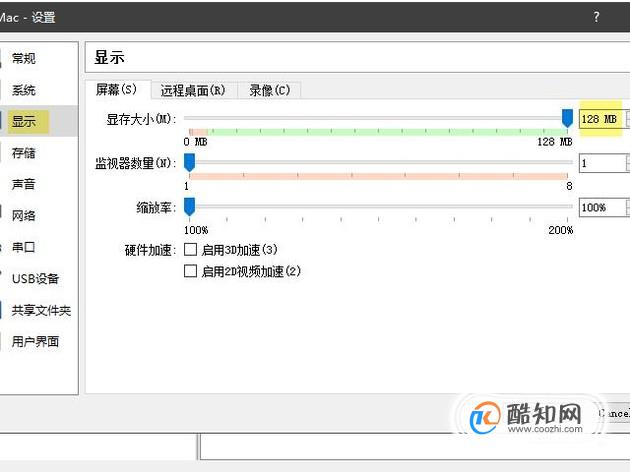
- 06显示-显存大小:设置它为128 MB
- 07存储:macOS 10.12.vmdk

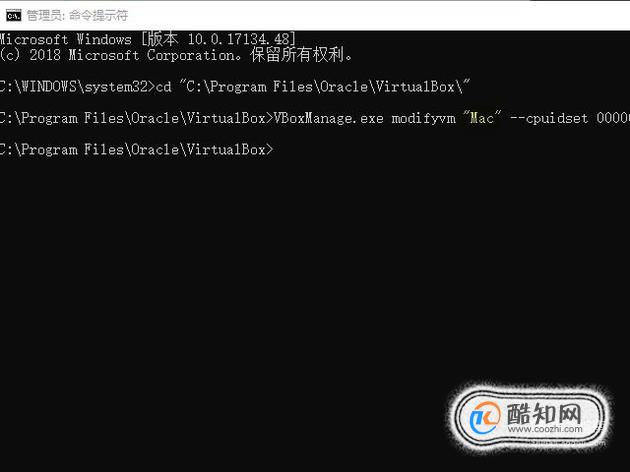
- 08通过CMD将下面的代码添加到VirtualBox,“确保以管理员的身份运行它”,使用命令条之前关闭virtualbox后台程序
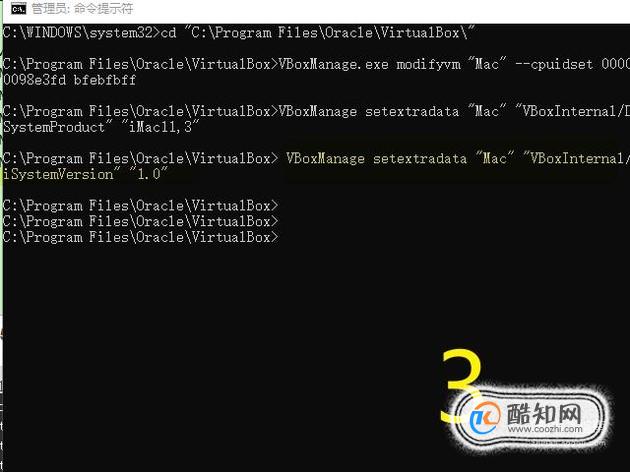
cd “C:\Program Files\Oracle\VirtualBox\”

- 09接下来是6条代码
注意:将“Mac”替换为 虚拟机名称,然后复制粘贴到CMD。
你可以使用记事本的替换功能,如下图
VBoxManage.exe modifyvm “Mac” –cpuidset 00000001 000106e5 00100800 0098e3fd bfebfbff
VBoxManage setextradata “Mac” “VBoxInternal/Devices/efi/0/Config/DmiSystemProduct” “iMac11,3”
VBoxManage setextradata “Mac” “VBoxInternal/Devices/efi/0/Config/DmiSystemVersion” “1.0”
VBoxManage setextradata “Mac” “VBoxInternal/Devices/efi/0/Config/DmiBoardProduct” “Iloveapple”
VBoxManage setextradata “Mac” “VBoxInternal/Devices/smc/0/Config/DeviceKey” “ourhardworkbythesewordsguardedpleasedontsteal(c)AppleComputerInc”
VBoxManage setextradata “Mac” “VBoxInternal/Devices/smc/0/Config/GetKeyFromRealSMC” 1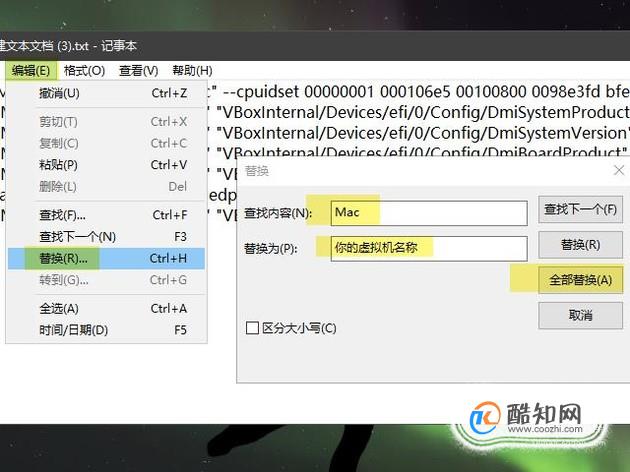

- 10VBoxManage.exe modifyvm “此处是你的虚拟机名称请替换” –cpuidset 00000001 000106e5 00100800 0098e3fd bfebfbff
- 11VBoxManage setextradata “此处是你的虚拟机名称请替换” “VBoxInternal/Devices/efi/0/Config/DmiSystemProduct” “iMac11,3”

- 12VBoxManage setextradata “此处是你的虚拟机名称请替换” “VBoxInternal/Devices/efi/0/Config/DmiSystemVersion” “1.0”
- 13VBoxManage setextradata “此处是你的虚拟机名称请替换” “VBoxInternal/Devices/efi/0/Config/DmiBoardProduct” “Iloveapple”

- 14VBoxManage setextradata “此处是你的虚拟机名称请替换” “VBoxInternal/Devices/smc/0/Config/DeviceKey” “ourhardworkbythesewordsguardedpleasedontsteal(c)AppleComputerInc”

- 15VBoxManage setextradata “此处是你的虚拟机名称请替换” “VBoxInternal/Devices/smc/0/Config/GetKeyFromRealSMC” 1

- 16非Virtualbox 5. x.x版本代码不同,下面是4.x.x的版本代码,原理是修改cpu代码
cd “C:\Program Files\Oracle\VirtualBox\”
VBoxManage.exe modifyvm “AvoidErrors” –cpuidset 00000001 000306a9 04100800 7fbae3ff bfebfbff
VBoxManage setextradata “AvoidErrors” “VBoxInternal/Devices/efi/0/Config/DmiSystemProduct” “MacBookPro11,3”
VBoxManage setextradata “AvoidErrors” “VBoxInternal/Devices/efi/0/Config/DmiSystemVersion” “1.0”
VBoxManage setextradata “AvoidErrors” “VBoxInternal/Devices/efi/0/Config/DmiBoardProduct” “Iloveapple”
VBoxManage setextradata “AvoidErrors” “VBoxInternal/Devices/smc/0/Config/DeviceKey” “ourhardworkbythesewordsguardedpleasedontsteal(c)AppleComputerInc”
VBoxManage setextradata “AvoidErrors” “VBoxInternal/Devices/smc/0/Config/GetKeyFromRealSMC” 1
- 17务必等待代码加载完毕!

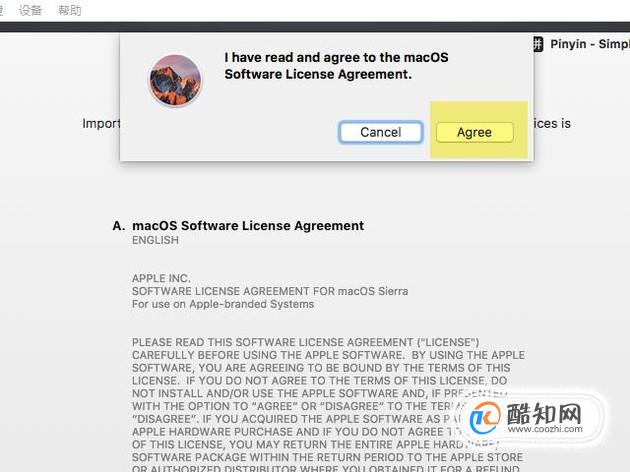
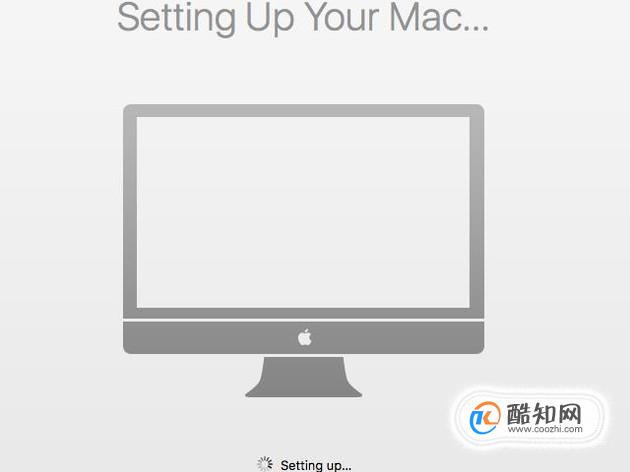
- 18进行简单的导航设置,完成后,现在可以运行虚拟机并享受macOS了。


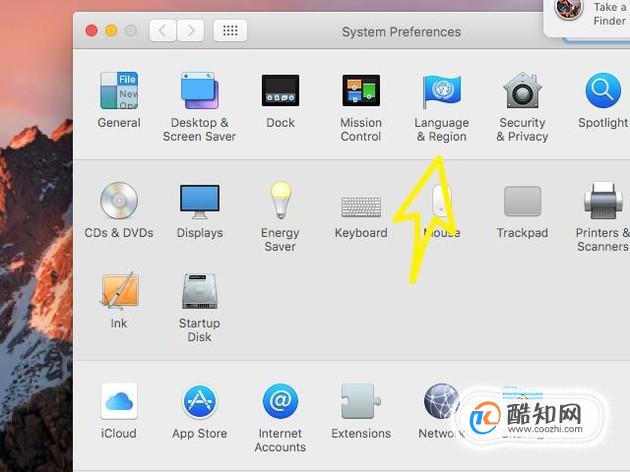
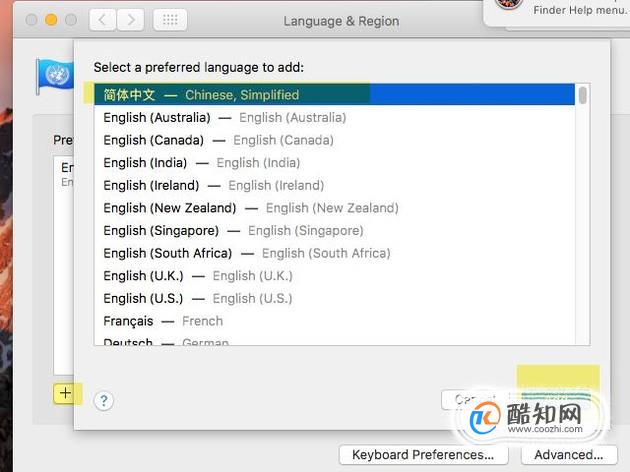
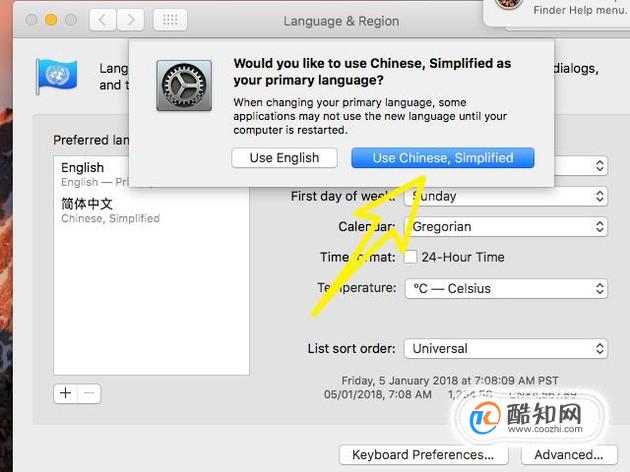
- 19操作语言设置由英文设置为中文的步骤,重启后生效。


特别提示
若刚加载虚拟机出现error不用管,请等待代码加载,实际情况是初次设置你需要等很久才能进入系统!
注意事项:
1、资源遇到是一堆字母与数字组合的,复制到电脑版的xunlei或BT新建下载即可。
2、度盘的资源容易失效,失效一般补不了,请理解!
3、如果支付后没有自动跳转,请等一两分钟让它自动跳转后再刷新看看,还不行的话请联系退款。
4、百家姓转换
免责声明:本站文章采用创作共用版权 CC BY-NC-ND/2.5/CN 许可协议,文章及资源均来自互联网收集,仅供用于学习和交流,请遵循相关法律法规,本站一切资源不代表本站立场!!!